Session Management (Set and Get Data from Session) in GWT

When you think about the Security of a web application 'Session Management' is the first thing that strikes in your head. I am now working with an enterprise web application using GWT and you know security is a very vital issue in an enterprise application. And we have ensured the security by managing session data. Here i will describe how to store and retrieve data from session by using GWT RPC.

Suppose you want to store the user name in session after login to the application and check the session value later. Then what do you do?

First create a GWT RPC Service named 'SessionManagementService'. You can give any other name as you like. In SessionManagementService interface add two methods

public void setUserName(String userName);
public String getUserName();

And synchronize the methods with 'SessionManagementServiceAsync'.
public void setUserName(String userName, AsyncCallback<Void> asyncCallback);
public void getUserName(AsyncCallback<String> asyncCallback);

Now implement the methods in 'SessionManagementServiceImpl'. Let's first talk about the setter method.
public void setUserName(String userName)
{
     HttpSession httpSession = getThreadLocalRequest().getSession(true);
     httpSession.setAttribute("userName", userName);
}

The getThreadLocalRequest method returns you a HttpServletRequest object for the current call. For simultaneous invocation you will get different request object. And the getSession method returns you the current HttpSession for the associated request. So you can get the current session of the current call by getThreadLocalRequest().getSession(true).


The setAttribute method binds an object to the associated session. It stores the object's value as a Name-Value pair. You can put any thing as the value of the object. A String value or List<String> any thing. Here the name of the object is "useName" and the object is bound to this session with this name.

Now come to the getter method.
public String getUserName()
{
    HttpSession session = getThreadLocalRequest().getSession(true);
    if (session.getAttribute("userName") != null)
    {
        return (String) session.getAttribute("userName");
    }
    else 
    {
        return "";
    }
}

Get the current session in the same way as described for the setter method. The getAttribute method returns the value of the object which is bound with this session with the specific name. Then simply cast it with your desired type.

Thats all. Just call the services according to your requirement. Play with GWT and stay in touched. :-D

How to Create an Editable TreeGrid in GXT(Ext GWT)

In our project I need to add the editable functionality with the GXT TreeGrid. Here I am going to share my experience about how to create an editable TreeGrid.

You may have already known that to build a TreeGrid the tree node objects must possess the functionality of BaseTreeModel of GXT. I have used the same EmployeeTreeNode and Folder class for leaf and parent nodes that i used in my previous blogs about GXT TreePanel. And in the TestData class i have populated the data to build the TreeGrid. You will find the code for these classes here.
(If you are new in GWT and GXT read my blogs about creating a new project in gwt and add GXT library)

First create a root object named model of the Folder class from TestData.getTreeModel() method.

Folder model = TestData.getTreeModel();
Then create a TreeStore object,store from this model and add data to the store
TreeStore<ModelData> store = new TreeStore<ModelData>();
store.add(model.getChildren(), true);

Now the time for defining ColumnConfig objects. First create a ColumnConfig, name and set a TextField as the editor of this object.
ColumnConfig name = new ColumnConfig("name", "Name", 100);
name.setRenderer(new TreeGridCellRenderer<ModelData>());
TextField<String> text = new TextField<String>();
text.setAllowBlank(false);
name.setEditor(new CellEditor(text));

The second column is the salary column so you can set a NumberField as the editor for this column.
ColumnConfig salary = new ColumnConfig("salary", "Salary", 100);
salary.setEditor(new CellEditor(new NumberField()));

In my example the third column is the joining date column. So you have to set a DateField as the editor for this column. For this first create a DateField object dateField and set the display format of the field. Then create a ColumnConfig object date and set the dateField as the editor of the date.
DateField dateField = new DateField();  
dateField.getPropertyEditor().setFormat(DateTimeFormat.getFormat("MM/dd/y"));
     
ColumnConfig date = new ColumnConfig("joiningdate", "Joining Date", 100); 
date.setAlignment(HorizontalAlignment.RIGHT);
date.setEditor(new CellEditor(dateField));  
date.setDateTimeFormat(DateTimeFormat.getMediumDateFormat());


Now create a ColumnModel from these three ColumnConfig objects.
ColumnModel cm = new ColumnModel(Arrays.asList(name, salary, date));

From the ColumnModel and TreeStore create an EditorTreeGrid object and set some property of the object.
EditorTreeGrid<ModelData> editorTreeGrid = new EditorTreeGrid<ModelData>(store,cm);
editorTreeGrid.setClicksToEdit(ClicksToEdit.TWO);
editorTreeGrid.setBorders(true);
editorTreeGrid.setSize(400, 400);
editorTreeGrid.setAutoExpandColumn("name");
editorTreeGrid.setTrackMouseOver(false);
The setter methods are self explanatory.

Finally create a ContentPanel and add the editorTreeGrid in this panel.
ContentPanel cp = new ContentPanel();
cp.setBodyBorder(false);
cp.setHeading("Cell TreeGrid Editing (2-Clicks)");
cp.setButtonAlign(HorizontalAlignment.CENTER);
cp.setLayout(new FitLayout());
cp.setFrame(true);
cp.setSize(600, 300);
cp.add(editorTreeGrid);
RootPanel.get().add(cp);
To view the live demo of this tutorial Click here.
The output will be like this

How to Create a Basic TreeGrid using GXT(Ext GWT)

When you want to display hierarchical data tree grid will be the right choice for this. GXT TreeGrid is a very powerful UI component which provides us with some wonderful functionality like row editor, row number, widget render etc. Here i present you the way of creating a basic TreeGrid in detail.

Create a new project named GxtBasicTreeGrid and add GXT library in the project. The tree node objects must possess the functionality of BaseTreeModel of GXT. I have used the same EmployeeTreeNode and Folder class for leaf and parent nodes that i used in my previous blogs about GXT TreePanel. And in the TestData class i have populated the data to build the TreeGrid. You will find the code for these classes here.

First create a root object named model of the Folder class from TestData.getTreeModel() method and create a TreeStore object,store from this model.
Folder model = TestData.getTreeModel();

TreeStore<ModelData> store = new TreeStore<ModelData>();
store.add(model.getChildren(), true);


Now define three ColumnConfig objects and create a ColumnModel from these objects.
ColumnConfig name = new ColumnConfig("name", "Name", 100);
name.setRenderer(new TreeGridCellRenderer<ModelData>());

 ColumnConfig salary = new ColumnConfig("salary", "Salary", 100);

 ColumnConfig date = new ColumnConfig("joiningdate", "Joining Date", 100);

 ColumnModel cm = new ColumnModel(Arrays.asList(name, salary, date));

Create a TreeGrid, treeGrid from the TreeStore, store and ColumnModel, cm. Then set some property of the treeGrid. Finally create a ContentPanel and add the treeGrid to this panel.
TreeGrid<ModelData> treeGrid = new TreeGrid<ModelData>(store, cm);
treeGrid.setBorders(true);
 treeGrid.getStyle().setLeafIcon(ICONS.user_add());
 treeGrid.setSize(400, 400); 
 treeGrid.setAutoExpandColumn("name");
 treeGrid.setTrackMouseOver(false);

 ContentPanel cp = new ContentPanel();
 cp.setBodyBorder(false);
 cp.setHeading("TreeGrid");
 cp.setButtonAlign(HorizontalAlignment.CENTER);
 cp.setLayout(new FitLayout());
 cp.setFrame(true);
 cp.setSize(600, 300);
 cp.add(treeGrid);
 RootPanel.get().add(cp);

Run the application and the output will be like this.

basicTreeGrid

To view the live demo of this tutorial Click here.

An Example Gallery of GXT(Ext GWT)

After written some blogs about GXT Grid and Tree I planned for merging all those in a single application. Beside this I want to test JDO in Google App Engine. As a result of this I have made a tiny application and deployed in the Google App Engine. Ext GWT (GXT) Example Gallery. I will be very pleased if you visit the site and give your valuable comment.

You can also check out the latest code of the project from Google svn by running this command

svn checkout http://gxtexamplegallery.googlecode.com/svn/trunk/ gxtexamplegallery-read-only


Add Context Menu with GXT(Ext GWT) TreePanel

Context Menu is frequently used with tree if you want to present a very user friendly interface to user like add,delete or enable,disable a tree node. Here i show you how you can add a context menu with add and delete menu items with GXT TreePanel very easily.
Create a new project named GxtContextMenuTree and add GXT library in the project. The tree node objects must possess the functionality of BaseTreeModel of GXT. I have used the same EmployeeTreeNode and Folder class for leaf and parent nodes that i used in my previous blogs related to GXT TreePanel. And in the TestData class i have populated the data to build the tree. You will find the code for these classes here.  Create a new package model under the client package and place the EmployeeTreeNode and Folder class there.


Now remove all the auto generated code from the GxtContextMenuTree class which is the entry point class of your project.  Go to the onModuleLoad  method of the class and first create a root node of the tree. Then create a TreeStore, store and add data to this store from the root node. Now create a TreePanel, tree from this store and set some property of the tree.
final Folder rootNode = TestData.getTreeModel();

final TreeStore<ModelData> store = new TreeStore<ModelData>();
store.add((List) rootNode.getChildren(), true);

final TreePanel<ModelData> tree = new TreePanel<ModelData>(store);
tree.setDisplayProperty("name");
tree.getStyle().setLeafIcon(ICONS.user_add());
tree.setWidth(250);


Now create a gxt Menu and add two MenuItem insert and remove with the menu.
Menu contextMenu = new Menu();
contextMenu.setWidth(140);

MenuItem insert = new MenuItem();
insert.setText("Insert Item");
insert.setIcon(ICONS.add());
contextMenu.add(insert);

MenuItem remove = new MenuItem();
remove.setText("Remove Selected");
remove.setIcon(ICONS.delete());
contextMenu.add(remove);

What you want to do by clicking on these menu items, just write them in the addSelectionListener method of the MenuItem. Then set the menu to the tree as a context menu by setContextMenu method of the TreePanel.
insert.addSelectionListener(new SelectionListener<MenuEvent>() {
public void componentSelected(MenuEvent ce) {
ModelData folder = tree.getSelectionModel().getSelectedItem();
if (folder != null) {
Folder child = new Folder("Add Child " + count++);
store.add(folder, child, false);
tree.setExpanded(folder, true);
}
}
});

remove.addSelectionListener(new SelectionListener<MenuEvent>() {
public void componentSelected(MenuEvent ce) {
List<ModelData> selected = tree.getSelectionModel().getSelectedItems();
for (ModelData sel : selected) 
{
store.remove(sel);
}
}
});

tree.setContextMenu(contextMenu);
RootPanel.get().add(tree);

In the addSelectionListener method of the insert menu item i have written the code for adding a Folder node with the selected node and in the same method of the remove menu item code for removing a list of selected nodes. To view the live demo of this tutorial Click here.

contextMenuTree

Add Filter Functionality with GXT(Ext GWT) TreePanel

In my previous blog i have articulated how you can create a basic tree using the GXT TreePanel. In the next few blogs i will try to write about some marvelous features which can be easily integrated with TreePanel. Here i state how to add filter functionality with TreePanel.

Create a new project named GxtFilterTree and add GXT library in the project. The tree node objects must possess the functionality of BaseTreeModel of GXT. I have used the same EmployeeTreeNode and Folder class for leaf and parent nodes that i used in my previous blog. And in the TestData class i have populated the data to build the tree. You will find the code for these classes here.

Go to the onModuleLoad method of GxtFilterTree class. Remove all the auto generated code of this method. Now create a TreeLoader, loader.

TreeLoader<ModelData> loader = new BaseTreeLoader<ModelData>(
  new TreeModelReader<List<ModelData>>());

BaseTreeLoader is default implementation of the TreeLoader interface which also extends the functionality of BaseLoader. Then create TreeStore, store by using the loader and create a TreePanel, tree with the store. Pass the root of the tree to the loader.load method as a load configuration which loads data using the configuration. You can get the root node from getTreeModel method of TestData class.


TreeStore<ModelData> store = new TreeStore<ModelData>(loader);
TreePanel<ModelData> tree = new TreePanel<ModelData>(store);
tree.setAutoLoad(true);
tree.setDisplayProperty("name");
tree.setWidth(250);
tree.setIconProvider(new ModelIconProvider<ModelData>() {
  public AbstractImagePrototype getIcon(ModelData model) {
    if (((TreeModel) model).isLeaf()) {
      return ICONS.user_add();
    }
    return null;
  }
});
loader.load(TestData.getTreeModel());

setAutoLoad method sets whether all children should automatically be loaded recursively. Other setter methods of TreePanel are self explanatory.

Now the time for creating a StoreFilterField and bind this to the store.
StoreFilterField<ModelData> filter = new StoreFilterField<ModelData>() {
  @Override
  protected boolean doSelect(Store<ModelData> store,
  ModelData parent, ModelData record, String property,
  String filter) {
    // only match leaf nodes
    if (record instanceof Folder) { 
      return false;
    }
    String name = record.get("name");
    name = name.toLowerCase();
    if (name.startsWith(filter.toLowerCase())) {
      return true;
    }
    return false;
  }
};
filter.bind(store);

StoreFilterField can filter any Store implementation. You just have to implement the doSelect method this class. Here i have matched only the leaf node.

You are just one step behind to run the application. Create a panel to add the filter and the tree and add that panel to the RootPanel. That’s all. Run the application and check the filter functionality.
VerticalPanel panel = new VerticalPanel();
panel.addStyleName("x-small-editor");
panel.setSpacing(8);
panel.add(new Html("<span class=text>Enter a search string such as 'dirk'</span>"));
panel.add(filter);
panel.add(tree);
RootPanel.get().add(panel);

}
To view the live demo of this tutorial Click here.

treeWithFilterFunc

How to Create a Simple Tree Using GXT(Ext GWT) TreePanel

TreePanel is another powerful UI tools provide by GXT.  It has expand-collapse functionality. You can add context menu or can add filter functionality with the TreePanel very easily. Here i describe every steps of creating a simple basic Tree using GXT in detail.

First create a new project named GxtBasicTree and add GXT library in the project. The tree node objects must possess the functionality of BaseTreeModel of GXT. In my example the leaf node objects are of EmployeeTreeNode class and parent node objects are of Folder class. Both of the classes extend BaseTreeModel class. Here is the code for the Employee class.

package com.ratul.GxtBasicTree.client.model;

import java.util.Date;

import com.extjs.gxt.ui.client.data.BaseTreeModel;

public class EmployeeTreeNode extends BaseTreeModel {
 private static final long serialVersionUID = 1L;

public EmployeeTreeNode() {
  }

  public EmployeeTreeNode(String name, double salary, Date joiningdate) {
    set("name", name);
    set("salary", salary);
    set("joiningdate", joiningdate);
  }

  public Date getJoiningdate() {
    return (Date) get("joiningdate");
  }

  public String getName() {
    return (String) get("name");
  }

  public double getSalary() {
    Double salary = (Double) get("salary");
    return salary.doubleValue();
  }
  public String toString() {
    return getName();
  }
}
As i have said previously the objects of the Folder class can be parent node for the Tree. So this class should have the functionality of adding children nodes. The constructor with a String and an Array of BaseTreeModel object serves the purpose. Here is the code for the Folder class.


package com.ratul.GxtBasicTree.client.model;

import java.io.Serializable;

import com.extjs.gxt.ui.client.data.BaseTreeModel;

public class Folder extends BaseTreeModel implements Serializable {
 private static final long serialVersionUID = 1L;
private static int ID = 0;
  
  public Folder() {
    set("id", ID++);
  }

  public Folder(String name) {
    set("id", ID++);
    set("name", name);
  }

  public Folder(String name, BaseTreeModel[] children) {
    this(name);
    for (int i = 0; i < children.length; i++) {
      add(children[i]);
    }
  }

  public Integer getId() {
    return (Integer) get("id");
  }

  public String getName() {
    return (String) get("name");
  }

  public String toString() {
    return getName();
  }
}

Now populate a root node containing all the child nodes by using the above two classes in the getTreeModel methodh of the TestData class.
package com.ratul.GxtBasicTree.client;

import com.google.gwt.i18n.client.DateTimeFormat;
import com.ratul.GxtBasicTree.client.model.Employee;
import com.ratul.GxtBasicTree.client.model.Folder;

public class TestData {

  public static Folder getTreeModel() 
  {
     DateTimeFormat f = DateTimeFormat.getFormat("yyyy-mm-dd");
  Folder[] folders = new Folder[] {
   new Folder("General Administration", new Folder[] {
    new Folder("General Manager", new EmployeeTreeNode[] {
     new EmployeeTreeNode("Hollie Voss", 150000, f.parse("2006-05-01")),
     new EmployeeTreeNode("Heriberto Rush", 150000,f.parse("2007-08-01")), }),
    new Folder("Executive", new EmployeeTreeNode[] {
     new EmployeeTreeNode("Christina Blake", 45000,f.parse("2008-11-01")),
     new EmployeeTreeNode("Chad Andrews", 45000, f.parse("2008-07-01")), }), }),
 
   new Folder("Information Technology",new Folder[] {
    new Folder("Senior S/W Engineer",new EmployeeTreeNode[] {
     new EmployeeTreeNode("Dirk Newman", 70000,f.parse("2007-08-21")),
     new EmployeeTreeNode("Emerson Milton",72000,f.parse("2009-05-07")),
     new EmployeeTreeNode("Gail Horton", 680000,f.parse("2008-05-01")), }),
    new Folder("S/W Engineer",new EmployeeTreeNode[] {
     new EmployeeTreeNode("Claudio Engle", 50000,f.parse("2007-02-01")),
     new EmployeeTreeNode("Buster misjenou",52000,f.parse("2009-06-10")),
     new EmployeeTreeNode("Bell Snedden", 50000,f.parse("2008-12-01")),
     new EmployeeTreeNode("Benito Meeks", 55000,f.parse("2006-05-01")), }), }),
 
   new Folder("Marketing", new Folder[] { 
    new Folder("Executive",new EmployeeTreeNode[] {
     new EmployeeTreeNode("Candice Carson", 50000, f.parse("2007-08-21")),
     new EmployeeTreeNode("Mildred Starnes", 50000,f.parse("2008-05-01")),
     new EmployeeTreeNode("Claudio Engle", 50000, f.parse("2009-06-15")), }), }), 
  };

  Folder root = new Folder("root");
  for (int i = 0; i < folders.length; i++) {
   root.add((Folder) folders[i]);
  }

  return root;
  }
}
You data is now ready to create a simple Tree. Go to the onModuleLoad method of GxtBasicTree class. Remove all the auto generated code of this method. Now first create a root object named model of the Folder class from TestData.getTreeModel() method and create a TreeStore object,store from this model.
public static final ExampleIcons ICONS = GWT.create(ExampleIcons.class);
public void onModuleLoad() 
{
       Folder model = TestData.getTreeModel();  
     
       TreeStore<ModelData> store = new TreeStore<ModelData>();  
       store.add(model.getChildren(), true);  
 
Now create a TreePanel, tree from this store and set display name, width and style of the tree.
final TreePanel<ModelData> tree = new TreePanel<ModelData>(store);  
       tree.setDisplayProperty("name");  
       tree.setWidth(250);  
       tree.getStyle().setLeafIcon(ICONS.user_add());
The two button expand and collapse provide the expand and collapse functionality by simple calling the tree.expandAll() and tree.collapseAll() method.
ButtonBar buttonBar = new ButtonBar();  
       Button expand = new Button("Expand All"); 
       Button collapse = new Button("Collapse All"); 
       expand.addSelectionListener(new SelectionListener<ButtonEvent>() {  
       public void componentSelected(ButtonEvent ce) {  
           tree.expandAll();  
         }  
       });
       
       collapse.addSelectionListener(new SelectionListener<ButtonEvent>() {  
        public void componentSelected(ButtonEvent ce) {  
            tree.collapseAll();  
          }  
        });
       buttonBar.add(expand);
       buttonBar.add(collapse);
        
       RootPanel.get().add(buttonBar);
       RootPanel.get().add(tree);
       
 }


That's all. Run it and check the functionality of the simple tree. To view the live demo of this tutorial Click here.

Working with GXT(Ext GWT) Grid : Create an Editable Grid

Last week i was so busy that i can not afford to manage time on writing. And i am afraid that whether i can keep my promise on writing a series of tutorials about GXT and GWT or not. In the upcoming days i have to work in six! projects simultaneously. Good thing is that there will be a lot of new things that i can learn and surely i will share those here whenever i get time. Now i will show you how you can make a GXT Grid editable with TextField, ComboBox and Date Picker.

Create a new project named GxtEditableGrid and add GXT library in the project. As like my previous blogs about GXT Grid i have used the same Employee model and TestData class for generating data. You will find the code of these classes here. Go to the onModuleLoad method of GxtEditableGrid class and remove all the auto generated code of this method.

Starting with creating a list of ColumnConfig and a ColumnConfig instance named column. Configure this column to show and edit Employee Name first. To add the editing functionality create a TextField and a CellEditor with this TextField. Then set the CellEditor as the editor of the column.

List<ColumnConfig> configs = new ArrayList<ColumnConfig>();
ColumnConfig column = new ColumnConfig();
column.setId("name");
column.setHeader("Employee Name");
column.setWidth(200);
TextField<String> text = new TextField<String>();  
text.setAllowBlank(false);  
text.setAutoValidate(true);  
column.setEditor(new CellEditor(text));
configs.add(column); 


For the Department column rather than using a TextField we are going to use a ComboBox to edit this field. First create a SimpleComboBox and add the possible values to it.

final SimpleComboBox<String> combo = new SimpleComboBox<String>();  
combo.setTriggerAction(TriggerAction.ALL);  
combo.add("General Administration");  
combo.add("Information Technology");  
combo.add("Marketing");  
combo.add("Accounts"); 

Then create a CellEditor with the SimpleComboBox and set it as the editor of the department column.

CellEditor editor = new CellEditor(combo) {  
@Override  
public Object preProcessValue(Object value) {  
if (value == null) {  
return value;  
}  
return combo.findModel(value.toString());  
}  

@Override  
public Object postProcessValue(Object value) {  
if (value == null) {  
return value;  
}  
return ((ModelData) value).get("value");  
}  
};  

column = new ColumnConfig("department", "Department", 150);
column.setAlignment(HorizontalAlignment.LEFT);
column.setEditor(editor);  
configs.add(column);

For the Designation column configure it like the Employee Name column and for the Salary column set a cell editor with NumberField. That is this field will only accept numeric values.

column = new ColumnConfig("designation", "Designation", 150);
column.setAlignment(HorizontalAlignment.LEFT);
TextField<String> text2 = new TextField<String>();  
text2.setAllowBlank(false);  
text2.setAutoValidate(true);  
column.setEditor(new CellEditor(text2));
configs.add(column);

column = new ColumnConfig("salary", "Slary", 100);  
column.setAlignment(HorizontalAlignment.RIGHT);  
final NumberFormat number = NumberFormat.getFormat("0.00");  
GridCellRenderer<Employee> checkSalary = new GridCellRenderer<Employee>() {  
public String render(Employee model, String property, ColumnData config, int rowIndex,  
int colIndex, ListStore<Employee> employeeList, Grid<Employee> grid) {  
double val = (Double) model.get(property);  
String style = val < 70000 ? "red" : "green";  
return "<span style='color:" + style + "'>" + number.format(val) + "</span>";
}  
};  
column.setRenderer(checkSalary); 
column.setEditor(new CellEditor(new NumberField()));  
configs.add(column);

To change date field in a Grid with date picker create a DateField, set a date fomat for the DateField and finally set this as the editor for the ColumnConfig.

DateField dateField = new DateField();  
dateField.getPropertyEditor().setFormat(DateTimeFormat.getFormat("MM/dd/y"));

column = new ColumnConfig("joiningdate", "Joining Date", 100);
column.setAlignment(HorizontalAlignment.RIGHT);
column.setEditor(new CellEditor(dateField));  
column.setDateTimeFormat(DateTimeFormat.getMediumDateFormat());
configs.add(column);

To enable the editable functionality of grid you have to create an instance of EditorGrid class instead of a Grid class now. Other things are described in my previous tutorials about GXT Grid.

ListStore<Employee> employeeList = new ListStore<Employee>();
employeeList.add(TestData.getEmployees());
ColumnModel cm = new ColumnModel(configs);

final EditorGrid<Employee> grid = new EditorGrid<Employee>(employeeList, cm);
grid.setStyleAttribute("borderTop", "none");
grid.setAutoExpandColumn("name");
grid.setBorders(true);
grid.setStripeRows(true);

ContentPanel cp = new ContentPanel();
cp.setBodyBorder(false);
cp.setHeading("Employee List");
cp.setButtonAlign(HorizontalAlignment.CENTER);
cp.setLayout(new FitLayout());
cp.setSize(700, 300);
cp.add(grid);
RootPanel.get().add(cp);

That's all. Run the application check the magic GXT. To view the live demo of this tutorial Click here.

editableGrid

Working with GXT(Ext GWT) Grid : Add Grouping Funtionality

Grouping is very helpful when you view a large set of data. It creates a more readable view for the user. GXT provides us with a very easy way of adding grouping functionality with a grid. Here i describe how to add grouping functionality with GXT grid.

Create a new project named GxtGridGrouping and add GXT library in the project. As like my previous blogs about GXT Grid i have used the same Employee model and TestData class for generating data. You will find the code of these classes here. Go to the onModuleLoad method of GxtGridGrouping class and remove all the auto generated code of this method.

First create an instance of GroupingStore, a specialized store implementation which extends the ListStore that provides for grouping models by one of the available fields.

GroupingStore<Employee> employeeList = new GroupingStore<Employee>();  
employeeList.add(TestData.getEmployees());  
employeeList.groupBy("department");   

The groupBy method takes a property of your model by which you want to group your grid. In the example i have grouped the grid by 'department' property. You can change it to 'designation' property and see how it works.

Now define a list of ColumnConfig and a ColumnModel by using this list as before.
List<Columnconfig> configs = new ArrayList<Columnconfig>();

ColumnConfig column = new ColumnConfig();  
column.setId("name");  
column.setHeader("Employee Name");  
column.setWidth(200);  
configs.add(column);

column = new ColumnConfig("department", "Department", 150);  
column.setAlignment(HorizontalAlignment.LEFT);  
configs.add(column);

column = new ColumnConfig("designation", "Designation", 150);   
column.setAlignment(HorizontalAlignment.LEFT);  
configs.add(column);

column = new ColumnConfig("salary", "Slary", 100);  
column.setAlignment(HorizontalAlignment.RIGHT);  
final NumberFormat number = NumberFormat.getFormat("0.00");  
GridCellRenderer<Employee> checkSalary = new GridCellRenderer<Employee>() {  
public String render(Employee model, String property, ColumnData config, int rowIndex,  
int colIndex, ListStore<Employee> employeeList, Grid<Employee> grid) {  
double val = (Double) model.get(property);  
String style = val < 70000 ? "red" : "green";  
return "<span style='color:" + style + "'>" + number.format(val) + "</span>"; 
}  
};  
column.setRenderer(checkSalary);  
configs.add(column);

column = new ColumnConfig("joiningdate", "Joining Date", 100);  
column.setAlignment(HorizontalAlignment.RIGHT);  
column.setDateTimeFormat(DateTimeFormat.getShortDateFormat());  
configs.add(column);

final ColumnModel cm = new ColumnModel(configs); 

Create an instance of GroupView which groups the data based on the GroupStore. Then set it as the view of the Grid.

GroupingView view = new GroupingView();  
view.setForceFit(true);  
view.setGroupRenderer(new GridGroupRenderer() {  
public String render(GroupColumnData data) {  
String f = cm.getColumnById(data.field).getHeader();  
String l = data.models.size() == 1 ? "Item" : "Items";  
return f + ": " + data.group + " (" + data.models.size() + " " + l + ")";  
}  
});  

Grid<Employee> grid = new Grid<Employee>(employeeList, cm);  
grid.setView(view);  
grid.setBorders(true);

Here setForceFit is set true to auto expand the columns to fit the grid width and setGroupRenderer is used to create a heading for the groups.

Finally add the grid to the content panel.

ContentPanel cp = new ContentPanel();  
cp.setBodyBorder(false);  
cp.setHeading("Employee List");  
cp.setButtonAlign(HorizontalAlignment.CENTER);  
cp.setLayout(new FitLayout());  
cp.setSize(700, 420); 
cp.add(grid);  
RootPanel.get().add(cp);


Run the application and see how readable the grid is now. To view the live demo of this tutorial Click here.
gxtGridGrouping

Working with GXT(Ext GWT) Grid : Add Local Pagination Functionality

In my previous blog i have described how to create a simple Grid of GXT.  I have a plan to write a series of blog about other useful functionalities which can be added to the Grid. Here i write down the way of adding local pagination functionality with the Grid.

Create a new project named GxtPagingExample and add GXT library in the project. To create a grid at first you need a base model class and have to generate data for that model. In this tutorial i have used the same Employee model and TestData class for generating data which i used in my previous blog. You will find the code of these classes there.

Now go to the onModuleLoad method of GxtPagingExample class. Remove all the auto generated code of this method. First create an instance of PagingModelMemoryProxy which is a specialized DataProxy that supports paging when the entire data set is in the memory.

PagingModelMemoryProxy proxy = new PagingModelMemoryProxy(TestData.getEmployees());
   PagingLoader loader = new BasePagingLoader(proxy);
   loader.setRemoteSort(true);
   ListStore<Employee> employeeList = new ListStore<Employee>(loader);  
BasePagingLoader is an implementation of the PagingLoader interface which loads data using the proxy.If remote sort is enable then it will allow you to sort between the whole data set otherwise the sorting will be done only between the viewable data set. Then create a ListStore of Employee type.


Now create a PagingToolBar widget then bind it with the loader. It takes the page size in the constructor.
final PagingToolBar toolBar = new PagingToolBar(5);
   toolBar.bind(loader);
   loader.load(0, 5);
The arguments of the load method of PagingLoader are the begin index and page size.

Create a list of ColumnConfig and define each column. Then create a grid and add the grid and the PagingToolBar in a panel.

List<Columnconfig> configs = new ArrayList<Columnconfig>();

ColumnConfig column = new ColumnConfig();  
column.setId("name");  
column.setHeader("Employee Name");  
column.setWidth(200);  
configs.add(column);

column = new ColumnConfig("department", "Department", 150);  
column.setAlignment(HorizontalAlignment.LEFT);  
configs.add(column);

column = new ColumnConfig("designation", "Designation", 150);  
column.setAlignment(HorizontalAlignment.LEFT);  
configs.add(column);

column = new ColumnConfig("salary", "Slary", 100);  
column.setAlignment(HorizontalAlignment.RIGHT);  
final NumberFormat number = NumberFormat.getFormat("0.00");  
GridCellRenderer<Employee> checkSalary = new GridCellRenderer<Employee>() {  
public String render(Employee model, String property, ColumnData config, int rowIndex,  
int colIndex, ListStore<Employee> employeeList, Grid<Employee> grid) {  
double val = (Double) model.get(property);  
String style = val < 70000 ? "red" : "green";  
return "<span style='color:" + style + "'>" + number.format(val) + "</span>"; 
}  
};  
column.setRenderer(checkSalary);  
configs.add(column);

column = new ColumnConfig("joiningdate", "Joining Date", 100);  
column.setAlignment(HorizontalAlignment.RIGHT);  
column.setDateTimeFormat(DateTimeFormat.getShortDateFormat());  
configs.add(column);

ColumnModel cm = new ColumnModel(configs);
Grid<Employee> grid = new Grid<Employee>(employeeList, cm); 
grid.setStyleAttribute("borderTop", "none"); 
grid.setAutoExpandColumn("name"); 
grid.setBorders(true); 
grid.setStripeRows(true);

ContentPanel cp = new ContentPanel();  
cp.setBodyBorder(false);  
cp.setHeading("Employee List");  
cp.setButtonAlign(HorizontalAlignment.CENTER);  
cp.setLayout(new FitLayout());  
cp.setSize(700, 300); 
cp.add(grid);  
cp.setBottomComponent(toolBar);
RootPanel.get().add(cp);

Explanation of the above code is written here.
That's all. Run the application and test the pagination functionality. To view the live demo of this tutorial Click here.

How to create a simple Grid using GXT(Ext GWT)

GXT provides us with many powerful UI tools. One of this is the Grid. You can select which column you want to see or which you want to discard from the Grid at run time. Can sort the Grid by any column in both ascending and descending order. More over with the GridCellRenderer you can customized the look and feel of a cell. This tutorial describes every steps of creating a simple Grid using GXT in detail.
First create a new project named GxtGridExample and add GXT library in the project.  To show a list of data in the Grid you have to prepare the data first. In this tutorial i am going to show you a list of employee. So i need a Employee class which extends the BaseModel class of the GXT. Here is the code for the Employee class.
package com.ratul.GxtGridExample.client.model;
import java.util.Date;
import com.extjs.gxt.ui.client.data.BaseModel;

public class Employee extends BaseModel {
private static final long serialVersionUID = 1L;

public Employee() {
}
public Employee(String name, String department, String designation,double salary, Date joiningdate) {
set("name", name);
set("department", department);
set("designation", designation);
set("salary", salary);
set("joiningdate", joiningdate);
}
public Date getJoiningdate() {
return (Date) get("joiningdate");
}
public String getName() {
return (String) get("name");
}
public String getDepartment() {
return (String) get("department");
}
public String getDesignation() {
return (String) get("designation");
}
public double getSalary() {
Double salary = (Double) get("salary");
return salary.doubleValue();
}
public String toString() {
return getName();
}
}


Employee has 5 properties and to set the value of a property the set method is used. First parameter of the method is the property name and second is the value of that property. The class has also the getter method for each property.
Now populate a list of Employee in the TestData class.
package com.ratul.GxtGridExample.client;

import java.util.ArrayList;
import java.util.List;
import com.google.gwt.i18n.client.DateTimeFormat;
import com.ratul.GxtGridExample.client.model.Employee;

public class TestData {

public static List<Employee> getEmployees()
{
  List<Employee> employees = new ArrayList<Employee>();
DateTimeFormat f = DateTimeFormat.getFormat("yyyy-mm-dd");
  employees.add(new Employee("Hollie Voss","General Administration","Executive Dir  ector",150000,f.parse("2006-05-01")));
  employees.add(new Employee("Emerson Milton","Information Technology","CTO",12000  0,f.parse("2007-03-01")));
  employees.add(new Employee("Christina Blake","Information Technology","Project M  anager",90000,f.parse("2008-08-01")));
  employees.add(new Employee("Heriberto Rush","Information Technology","Senior S/W  Engineer",70000,f.parse("2009-02-07")));
  employees.add(new Employee("Candice Carson","Information Technology","S/W Engine  er",60000,f.parse("2007-11-01")));
  employees.add(new Employee("Chad Andrews","Information Technology","Senior S/W E  ngineer",70000,f.parse("2008-02-01")));
  employees.add(new Employee("Dirk Newman","Information Technology","S/W Engineer"  ,62000,f.parse("2009-03-01")));
  employees.add(new Employee("Bell Snedden","Information Technology","S/W Engineer  ",73000,f.parse("2007-07-07")));
  employees.add(new Employee("Benito Meeks","Marketing","General Manager",105000,f  .parse("2008-02-01")));
  employees.add(new Employee("Gail Horton","Marketing","Executive",55000,f.parse("  2009-05-01")));
  employees.add(new Employee("Claudio Engle","Marketing","Executive",58000,f.parse  ("2008-09-03")));
  employees.add(new Employee("Buster misjenou","Accounts","Executive",52000,f.pars  e("2008-02-07")));

return employees;
}
}

You data is prepared now to place in a GXT Grid.
Go to the onModuleLoad method of GxtGridExample class. Remove all the auto generated code of this method.
First create a list of ColumnConfig and configure each column.

List<Columnconfig> configs = new ArrayList<Columnconfig>();

ColumnConfig column = new ColumnConfig();  
column.setId("name");  
column.setHeader("Employee Name");  
column.setWidth(200);  
configs.add(column);

column = new ColumnConfig("department", "Department", 150);  
column.setAlignment(HorizontalAlignment.LEFT);  
configs.add(column);

column = new ColumnConfig("designation", "Designation", 150);  
column.setAlignment(HorizontalAlignment.LEFT);  
configs.add(column);

column = new ColumnConfig("salary", "Slary", 100);  
column.setAlignment(HorizontalAlignment.RIGHT);  
final NumberFormat number = NumberFormat.getFormat("0.00");  
GridCellRenderer<Employee> checkSalary = new GridCellRenderer<Employee>() {  
public String render(Employee model, String property, ColumnData config, int rowIndex,  
int colIndex, ListStore<Employee> employeeList, Grid<Employee> grid) {  
double val = (Double) model.get(property);  
String style = val < 70000 ? "red" : "green";  
return "<span style='color:" + style + "'>" + number.format(val) + "</span>";   
}  
};  
column.setRenderer(checkSalary);  
configs.add(column);

column = new ColumnConfig("joiningdate", "Joining Date", 100);  
column.setAlignment(HorizontalAlignment.RIGHT);  
column.setDateTimeFormat(DateTimeFormat.getShortDateFormat());  
configs.add(column);

The setId method bind the column with a property of the model and the setHeader method set the column header. You can also set this property of the ColumnConfig by using the constructor.  For the salary column here i define a custom GridCellRenderer<Employee> and set it with the setRenderer method which set the color of the salary value either green or red by checking its value. The other methods are self explanatory.
Create a ListStore of Employee type and add the employee list created in the TestData class.


ListStore<Employee> employeeList = new ListStore<Employee>();  
employeeList.add(TestData.getEmployees());

Now create a ColumnModel with the column configurations defined above and a Grid of Type Employee.

ColumnModel cm = new ColumnModel(configs);
Grid<Employee> grid = new Grid<Employee>(employeeList, cm); 
grid.setStyleAttribute("borderTop", "none"); 
grid.setAutoExpandColumn("name"); 
grid.setBorders(true); 
grid.setStripeRows(true);

The setAutoExpandColumn is used to defined which column will be expanded automatically when you hide a column. Other methods are self identifying.
You are just one step away from running the code. Create a ContentPanel and add the Grid to the panel.
ContentPanel cp = new ContentPanel();  
cp.setBodyBorder(false);  
cp.setHeading("Employee List");  
cp.setButtonAlign(HorizontalAlignment.CENTER);  
cp.setLayout(new FitLayout());  
cp.setSize(700, 300); 
cp.add(grid);  
RootPanel.get().add(cp);


Run the application and check the magic of GXT Grid. To view the live demo of this tutorial Click here.
employeeList

Keep yourself updated with the latest GWT technologies (gwt , app engine and gxt)

It’s been long since i have worked with GWT. I have been very busy with my scheduled tasks and can not afford to spend time on investing the features of this outstanding web technology.  Today i have sit with it and found that everything is required to be updated. The SDK for GWT, Google App Engine and the Ext GWT Library (The world is running fast?huh). I have updated all these and  here i write down the procedure for eclipse 3.4.

Download GWT version 1.7 from here and Google App Engine SDK 1.2.2 from here. Unzip the folders then open the Window->Preference window of eclipse.

Expand the Google menu from the left tree menu.  Select the Web Toolkit menu and it will show you the previous version of GWT. Click on the Add Button and select the unzipped folder as the installation directory.  Now check the latest SDK so that it will be the default SDK for the newly created projects.

gwtupdate1


Now select the App Engine menu and follow the steps stated above to add the latest version of the SDK.

You are now ready to use the latest version of GWT and Google App Engine SDK.

To use the latest version of Ext GWT library download this from here and follow my previous blog about how to use it in your GWT project.

How to use Ext GWT(GXT) in Eclipse 3.4 to create a rich internet application

Ext GWT is a Java library for building rich internet applications with the Google Web Toolkit (GWT). If you have started working with GWT you will find the Ext GWT library very helpful for its high performance and customizable UI widgets. Here I describe you how to use this library in your GWT project.

First of all download Ext GWT 1.2.4 SDK, the latest stable version of this library and extract it.

Now Create a GWT project by following the steps I have described in my previous blog. Follow the steps to add gxt.jar to the project.

->Right click on project and select the properties menu..
->Select Java Build Path.
->Select Libraries tab.
->Click on Add External JARS and select gxt.jar. (You will find this jar file inside the folder where you have extracted the library previously. )


Now change the your_project_name.gwt.xml file. Add the following line in this file.

<inherits name='com.extjs.gxt.ui.GXT'/>


Here goes the tricky part. You will find a folder named resources in the extracted folder. This contains the css and images used in this library. Copy the css and images folder in the war folder of your application. Now add the following stylesheet to your host page.

<link rel="stylesheet" type="text/css" href="css/ext-all.css" />


And remember Ext GWT requires no doctype or the following doctype (quirksmode).

<!DOCTYPE HTML PUBLIC "-//W3C//DTD HTML 4.01 Transitional//EN">


That's all. You are now ready to use the Ext GWT library to enhance your application.

Getting started with GWT : Create your first GWT application in Eclipse 3.4

To my mind GWT is going to take the lead among the web application development tools. So this is the high time to start learning about GWT. Here I describe you how to create your first GWT application in Eclipse 3.4 (Ganymede).

If you have not installed Google plugin and SDK for eclipse please go to this page and follow the instructions.

Create your project
Select File-> New-> Web Application project. Enter "FirstGwtApp" for your project name and "com.ratul.FirstGwtApp" for the package name.


Create GWT entry point

Now you have to create an Entry point class which is similar to the main method in Java.
Right click on the "com.ratul.FirstGwtApp.client" and select New-> Class. Enter "HelloWorld" as the name of the class.


This class must implement the interface "com.google.gwt.core.client.EntryPoint".
So click on the Add button and write "entrypoint" in the choose interface text field.
Select the matching item.


Here is the code of the HelloWorld class

package com.ratul.FirstGwtApp.client;

import com.google.gwt.core.client.EntryPoint;

import com.google.gwt.event.dom.client.ClickEvent;
import com.google.gwt.event.dom.client.ClickHandler;
import com.google.gwt.user.client.Window;
import com.google.gwt.user.client.ui.Button;
import com.google.gwt.user.client.ui.Label;
import com.google.gwt.user.client.ui.TextBox;
import com.google.gwt.user.client.ui.RootPanel;

public class HelloWorld implements EntryPoint {

@Override
public void onModuleLoad() {
Label label = new Label("Enter your name:");
final TextBox textBox = new TextBox();
Button button = new Button("Click Here");
button.addClickHandler(new ClickHandler() {
@Override
public void onClick(ClickEvent event) {
Window.alert("Hello "+ textBox.getText());
}
});

RootPanel.get().add(label);
RootPanel.get().add(textBox);
RootPanel.get().add(button);
}
}


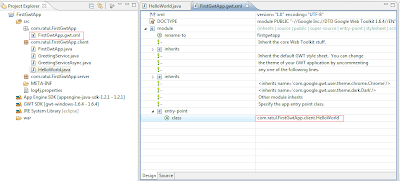
Now change the FirstGwtApp.gwt.xml in package com.ratul.FirstGwtApp to set the HelloWorld class as the entry point class of your application.


Create a Start HTML page

In the war folder you will find a file, named FirstGwtApp.html. Between the body tag write the following code

<!-- OPTIONAL: include this if you want history support -->
<iframe src="javascript:''" id="__gwt_historyFrame" tabindex="-1" style="border: 0pt none ; position: absolute; width: 0pt; height: 0pt;"></iframe>

<h1>Welcome to my first GWT Application</h1>


Configure the web.xml

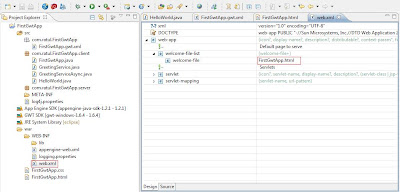
Go to war-> WEB-INF folder and there you will find a web.xml file. The Google Plug-in created this configuration file and placed a reference to a servlet.
Set the FirstGwtApp.html as the welcome file of your application.


You are only one step away from running your first GWT application.

Run GWT application

To run your application right-click the project and select Run As -> "Web application".

The result will be like this.


Enter your name in the text field and click on the button. Your name will be appeared in the alert window :).


Implementing Strategy pattern to support different fingerprint device login system

In our ERP project one of the features of Human resource module is managing daily attendance of the employee using biometric authentication. Our client wants to use NAC 3000 as a fingerprint verification device.

The task is simple. The software of that device writes data in an access database and in a log file whenever an employee place finger on it. We just have to pull the data from the access file or the log file after certain interval. The problem is that as our ERP is generalized and can be customizable for any type of organization so we have to think about other devices that serve the same purpose.

We analyze that all the devices vary in one point and that is the format of the log file or the database file. That is only the file parsing algorithm varies from device to device. This motivates me to use Strategy pattern here as the Strategy pattern defines a family o algorithms, encapsulate each one and makes them interchangeable.

Class diagram


Details
LogInDevice is an abstract class which has an instance fileParser as the interface type not a concrete class implementation type. The LogInDevice objects will set the variable polymorphically to reference the specific file parser.

The FileParser is an interface which has four mehthods. The NAC300Parser, NAC2500Parser implements this interface. When we need to integrate a new device we just have to create a new class that will implement this interface. The code of parsing the logfile will be written in the parseFile() method.

Implementation of the doParsing() method of LogInDevice class

  
public void doParsing()
{
this.fileParser.parseFile();
userId = this.fileParser.getUserId();
purpose = this.fileParser.getPurpose();
time = this.fileParser.getTime();
//Code block for saving the data to database goes here.
}


In this part of the code we don't care about what kind of file parser it is.

Are you thinking of setting the fileParser instance variable? Let’s take a look at the NAC3000 class


public class NAC3000 extends LogInDevice
{
public NAC3000()
{
this.fileParser = new NAC3000Parser();
}
}


The NAC3000 uses the NAC3000Parser to handle its file parsing. So when the doParsing() is called the responsibility for the parsing is delegated to the NAC3000Parser object and we got our desired data.

Change the FileParser dynamically

To change the parsing algorithm dynamically you just need a setter method in LogInDevice class


public void setFileParser(FileParser fileParser)
{
this.fileParser = fileParser;
}


We can call this method anytime we want to change the file parsing algorithm on the fly.

With this design we can integrate a new Fingerprint or any other authentication device very easily in our system and obviously without modifying the existing code.

How to call a method dynamically using Java Reflection

In my previous post i have shown you how to create an instance dynamically using java reflection. Here i will show you how to call a method dynamically using reflection.

Let us start with a simple example. Assume that the method name is refreshForm and it has no argument. You can get the method using class.getMethod(methodName) method and then call the method using method.invoke(instance of the class) method.

 
String className = "com.commlink.cbs.appclient.gl.ChartsOfAccount"
String methodName = "refreshForm";

//get the Class
Class class = Class.forName(className);

// get the instance
Object obj = class.newInstance();

// get the method
Method method = class.getMethod(methodName );

//call the method
method.invoke(obj);


Things will be little complex if the method has some arguments. Suppose the refreshForm method takes two String values. To call this method using reflection first create an array of Class and then an array of Object. Use the class array in getMethod method and the Object array in invoke method in the following way.


String className = "com.commlink.cbs.appclient.gl.ChartsOfAccount"
String methodName = "refreshForm";
Class class = Class.forName(className );

Object obj = class.newInstance();

//create the class array
Class[] types = new Class[] { String.class,String.class};

//get the method
Method method = class.getMethod(methodName ,types);

//create the object array
Object[] args = new Object[]{new String("Hello"), new String("World")};

//call the method
method.invoke(obj,args);

How to create an instance of a class at runtime using Java Reflection

Java Reflection gives us the facility of creating an instance of any class at run time. In our ERP project it helps us a lot to solve some critical problems.

First create a class using the class name then use the class.newInstance method
to create an instance of that class.


javax.swing.JPanel newPanel = null;

String className= "com.commlinkinfotech.cbs.appclient.gl.ChartsOfAccount";

Class class = Class.forName(className);

//we know that the ChartsOfAccount is a JPanel class so cast this to JPanel
newPanel = (JPanel) class.newInstance();


But if the constructor of your class takes some parameters then what will you do?

You have to create an array of your argument class. Use this to create a constructor of your class using the class.getConstructor method. Now call the constructor.newInstance method with the value of the arguments and it gives you an instance of the class.


javax.swing.JPanel newPanel = null;

String className= "com.commlinkinfotech.cbs.appclient.gl.ChartsOfAccount";

//create an array of parameter classes
Class[] types = new Class[] { String.class };

Class class = Class.forName(className);
//create a constructor with the types array
Constructor constructor = class.getConstructor(types);

//create an array of argument values
Object[] args = new Object[] {new String("Hello")};

//now use ther args array to create an instance
newPanel = (JPanel) constructor .newInstance(args);

Understanding GroupLayout in Java

GroupLayout is one of the most effective layout managers in Java to place the GUI elements in a very organized way. Here I show you how to use Group Layout to build your GUI.

GroupLayout works with the horizontal and vertical layouts separately. The layout is defined for each dimension independently and it uses two types of arrangements -- sequential and parallel, combined with hierarchical composition. Usually, components placed in parallel in one dimension are in a sequence in the other, so that they do not overlap.

Let’s start with a very simple example to understand this layout.

Suppose you have to put one JLabel and one JTextField component in a row within a container named jpTestGroupLayout


You have to put these comonents both in a Horizontal sequential group and in a Vertical sequential group. But how?

To add the components in a horizontal sequential group at first you need to create two parallel groups. Add the JLable and the JTextField in the parallel groups then add these groups sequentially in the Horizontal sequential group.

And to add the components in a Vertical sequential group, create one parallel group and add the components in the group. Then add this parallel group to your vertical sequential group.

Now let’s look at the code to create the layout described above.


//declare the two component
JLabel label = new javax.swing.JLabel();
label.setText("JLabel");
label.setBorder(null);
JTextField jtfValue = new javax.swing.JTextField();
jtfValue.setText("JTextField");

//create a GroupLayout object associate with the panel
GroupLayout grpLayout = new GroupLayout(jpTestGroupLayout); jpTestGroupLayout.setLayout(grpLayout);
grpLayout.setAutoCreateGaps(true); // specify automatic gap insertion
grpLayout.setAutoCreateContainerGaps(true);

//create the Horizontal and Vertical and sequential group
GroupLayout.SequentialGroup horizontalSeqGrp = grpLayout.createSequentialGroup();
GroupLayout.SequentialGroup verticalSeqGrp = grpLayout.createSequentialGroup();

//create two parallel group for adding the components in the horizontal sequential group
GroupLayout.ParallelGroup hParallelGroup1 = grpLayout.createParallelGroup(GroupLayout.Alignment.LEADING);
GroupLayout.ParallelGroup hParallelGroup2 = grpLayout.createParallelGroup(GroupLayout.Alignment.LEADING);

//add the components
hParallelGroup1.addComponent(label);
hParallelGroup2.addComponent(textField);

//add two parallel groups sequentially in the horizontal sequential group
horizontalSeqGrp.addGroup(hParallelGroup1);
horizontalSeqGrp.addGroup(hParallelGroup2);

//create one parallel group for adding the components in the vertical sequential group
GroupLayout.ParallelGroup vparallelGroup1 = grpLayout.createParallelGroup(GroupLayout.Alignment.BASELINE);

//add the components
vparallelGroup1.addComponent(label);
vparallelGroup1.addComponent(textField);

//add this parallel group in the vertical sequential group
verticalSeqGrp.addGroup(vparallelGroup1);

//finally set the both sequential group to the grpLayout object
grpLayout.setHorizontalGroup(horizontalSeqGrp);
grpLayout.setVerticalGroup(verticalSeqGrp);


If you want to add another JLabel in the same row then what will you do?


It is very simple now. Just create another parallel group to add the new JLable in the Horizontal sequential group and to add this to the Vertical sequential group add this in the existing vertical parallel group.


JLabel label2 = new javax.swing.JLabel();
label2.setText("JLabel2");
label2.setBorder(null);
GroupLayout.ParallelGroup hParallelGroup3 = lout.createParallelGroup(GroupLayout.Alignment.LEADING);
hParallelGroup3.addComponent(label2);

//add the new parallel group to the horizontal sequential group
horizontalSeqGrp.addGroup(hParallelGroup3);
vparallelGroup1.addComponent(labe2l);


Now I describe another scenario. Suppose you want to add the second JLable in the following way.


The code will be like this


//add the new component in the hParallelGroup1
hParallelGroup1.addComponent(label2);

//create a new parallel group to add the new component in the vertical Sequential group
GroupLayout.ParallelGroup vparallelGroup2 = grpLayout.createParallelGroup(GroupLayout.Alignment.BASELINE);

//add the component to the new group
vparallelGroup2.addComponent(label2);

//add the new parallel group to the vertical sequential group
verticalSeqGrp.addGroup(vparallelGroup2);


Try the above examples yourself and definitely you will find this layout very easy to manage. For more information visit this link.

Filter a JTable row with input in a text field

In an enterprise application when there is huge amount data in a table
users feel comfortable if you provide them a option for filtering the
table. Here I show you an example of how to filter a JTable row with
input in a JTextField.

Declare a JTable and your own table model


private MyTableModel tableModel;
private javax.swing.JTable jtblSampleTable;


Now declare a table row sorter for that table model


private TableRowSorter sorter ;
//


Initialize all the above three declared variables


jtblSampleTable = new javax.swing.JTable();
tableModel = new MyTableModel();
sorter = new TableRowSorter(tableModel);
//


Bind the model with the table


jtblSampleTable.setModel(tableModel);


Set the sorter as the row sorter for the table


jtblSampleTable.setRowSorter(sorter);


Now declare a JTextField


jtfSearch = new javax.swing.JTextField();


Add a document listener for the search text field.


jtfSearch.getDocument().addDocumentListener(
new DocumentListener()
{
public void changedUpdate(DocumentEvent e)
{
newFilter();
}
public void insertUpdate(DocumentEvent e)
{
newFilter();
}
public void removeUpdate(DocumentEvent e)
{
newFilter();
}
}
);


Here is the newFilter method


private void newFilter()
{
RowFilter< MyTableModel , Object> rf = null;
//declare a row filter for your table model
Try
{
rf = RowFilter.regexFilter("^" + jtfSearch.getText(), 0);
//initialize with a regular expression
}
catch (java.util.regex.PatternSyntaxException e)
{
return;
}
sorter.setRowFilter(rf);
}


The above example is able to filter JTable for its first column.

Show video from YouTube in your own website

To show a video from your website, first upload the video in YouTube.
After uploading the vidio add the following code in your website.


<object style="width: 360; height: 250; margin-top: auto; margin-bottom: auto; vertical-align: middle;">

<param name="movie" value="http://www.youtube.com/v/r-gDDUcaVqI&hl=en&fs=1>
</param>

<param name="allowFullScreen" value="true"> </param>

<embed src="http://www.youtube.com/v/r-gDDUcaVqI&hl=en&fs=1 type="application/x-shockwave-flash" allowfullscreen="true" width="360" height="250">
</embed>

</object>


In the param tag the value attribute holds the url of your video.
To change the display screen size simply change the width and height attribute
of the embed tag.

This is very simplet just copy and paste the code in your site and test it..

Creating a colorful rounded cornered Div

Rounded corner is one of the hottest topics in today’s web designing. Here you find a nice way of creating different colored rounded div. In my example, I have created one green and one yellow div.

The required css is


b.r1{margin: 0 5px}
b.r2{margin: 0 3px}
b.r3{margin: 0 2px}
h4,p{margin: 0 10px}

/*for yellow div*/
div#yellow_div{
margin: 0 5%;
background: #F7FC62;
/*change color here to get a different color div */
}
b.rtop_yellow, b.rbottom_yellow{display:block;background: #FFF}
b.rtop_yellow b, b.rbottom_yellow b{display:block;height: 1px;
overflow: hidden; background: #F7FC62}
/*change color here to get a different colored div */
b.rtop_yellow b.r4, b.rbottom_yellow b.r4{margin: 0 1px;
height: 2px}

/*for green div*/
div# green_div{
margin: 0 5%;
background: #8FFF63;
/*color changed */
}
b.rtop_green, b.rbottom_green{display:block;background: #FFF}
b.rtop_green b, b.rbottom_green b{display:block;height: 1px;
overflow: hidden; background: #8FFF63}
/*color changed */
b.rtop_green b.r4, b.rbottom_green b.r4{margin: 0 1px;
height: 2px}


Now you will find how to use this css to create two colorful div

<div id=" yellow_div " style="width:250px; ">
<b class="rtop_yellow"><b class="r1"></b><b class="r2"></b><b class="r3"></b>
<b class="r4"></b></b>
  place your content here<br>
  place your content here<br>
  place your content here<br>
<b class="rbottom_yellow"><b class="r4"></b><b class="r3"></b><b class="r2">
</b><b class="r1"></b></b>
</div>
<br>
<div id=" green_div " style="width:250px; ">
<b class="rtop_green"><b class="r1"></b><b class="r2"></b><b class="r3">
</b><b class="r4"></b></b>
  place your content here<br>
  place your content here<br>
  place your content here<br>
<b class="rbottom_green"><b class="r4"></b><b class="r3"></b><b class="r2">
</b><b class="r1"></b></b>
</div>


The result will be like this.


You can easily create you own color div just by changing the color in css I mentioned above
and use that name in div id and class attribute of b tag.

Total Pageviews

Blog Archive

Tags

Twitter Updates
    follow me on Twitter

    Followers